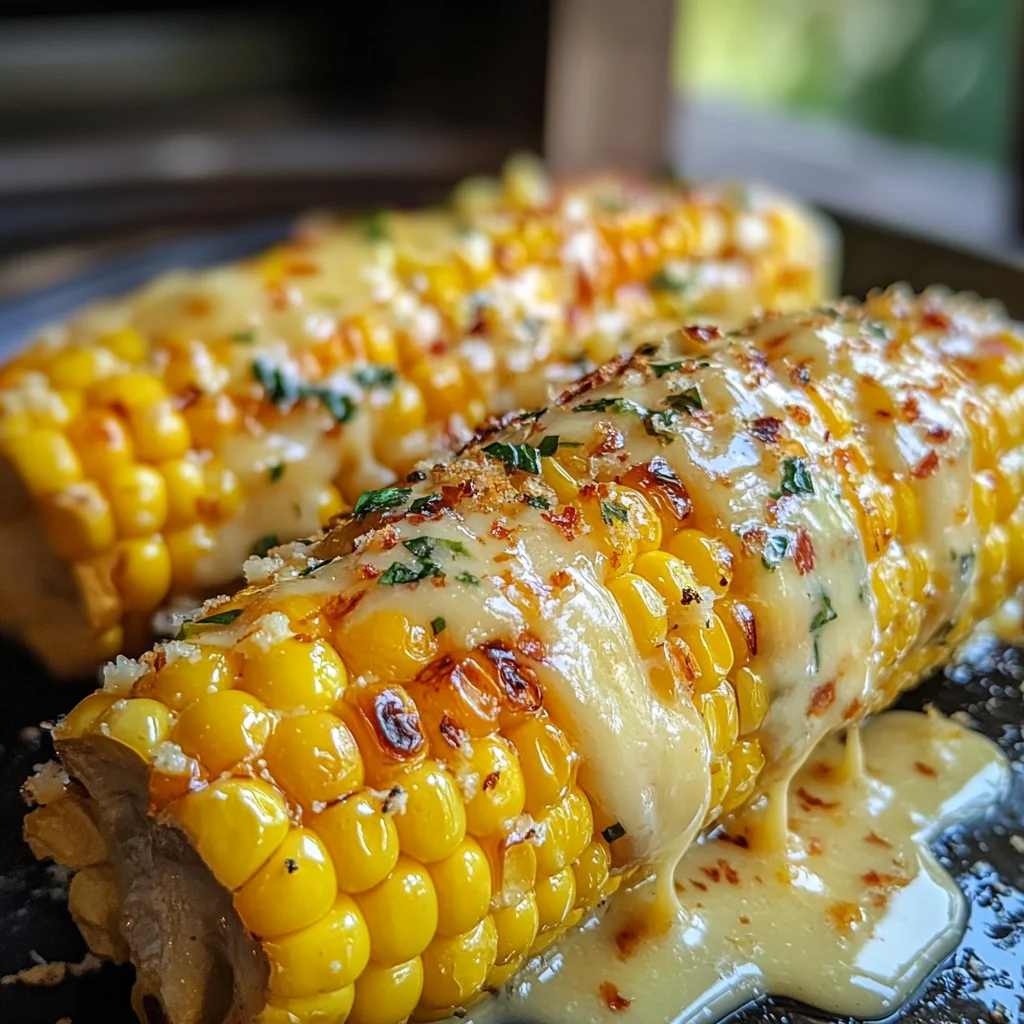
Imagine biting into a perfectly roasted ear of corn on the cob in the oven, its golden kernels bursting with sweetness and drizzled in melted butter, creating a mouthwatering sensation that dances on your taste buds. The smoky aroma wafting through the kitchen can transport you to sun-soaked summer barbecues, where laughter mingles with the scent of grilled delights and every bite is an invitation to savor the season.
This delightful dish is not just about flavors; it carries cherished memories of family gatherings, where we would eagerly await that first taste while playfully competing for who could eat the most. Whether served as a vibrant side at a summer picnic or enjoyed as a cozy treat during cooler months, corn on the cob in the oven promises an incredible flavor experience that will have you coming back for more.
Why Is corn on the cob in the oven So Irresistibly Good?
Freshness shines through with every bite of this tender, juicy corn. Simplicity is key—just husk, season, and roast for a hassle-free side dish! Flavor comes alive with melted butter and a sprinkle of paprika, salt, and pepper. Versatile enough to accompany any meal, it’s perfect for summer barbecues or cozy dinners. Plus, it’s a crowd-pleaser that will have everyone asking for more!
corn on the cob in the oven Ingredients
- For the Corn
- 4 ears fresh corn on the cob (Husked and cleaned) – Fresh corn adds sweetness and juiciness, making it perfect for roasting.
- For the Butter
- 4 tablespoons unsalted butter (Melted) – Melted butter enhances the flavor and helps the seasoning adhere to the corn.
- For the Seasoning
- 1 teaspoon salt – Salt brings out the natural sweetness of the corn on the cob in the oven.
- 1 teaspoon black pepper – Black pepper adds a subtle kick, balancing the sweetness of the corn.
- 1 teaspoon paprika – Paprika introduces a smoky depth, elevating your roasted corn experience.
How to Make corn on the cob in the oven
1. Preheat the oven to 400°F (200°C).
This temperature ensures that your corn will roast evenly, resulting in tender kernels bursting with flavor.
2. Husk the corn and remove all silk.
Take your 4 ears of fresh corn on the cob and peel away the green husks, making sure to remove every last strand of silk for a clean bite.
3. Wrap each ear of corn in aluminum foil.
Securely wrap each husked ear; this helps to trap moisture and keep your corn juicy while it cooks.
4. Place the wrapped corn on a baking sheet.
Arrange them neatly on the sheet to catch any drips, making cleanup a breeze after roasting.
5. Bake in the preheated oven for 30 minutes.
Let those beautiful ears roast until they become tender; you’ll know they’re ready when they smell deliciously sweet!
6. Remove from the oven and carefully unwrap the foil.
Be cautious of steam as you open each ear; let them cool slightly before handling to avoid burns.
7. Brush the corn with melted butter and sprinkle with salt, pepper, and paprika.
Your 4 tablespoons of unsalted butter will add richness, while the seasoning brings out that vibrant corn flavor—so delicious!
Optional: Add a squeeze of lime for a zesty finish!
Exact quantities are listed in the recipe card below.
Pro Tips for corn on the cob in the oven
- Freshness Matters: Use the freshest corn possible for the best flavor. Look for bright green husks and plump kernels.
- Husk Thoroughly: Ensure all silk is removed from the corn before wrapping. Any leftover silk can burn during cooking.
- Wrap Tightly: Wrap each ear securely in aluminum foil to trap steam, which helps cook the corn evenly and retain moisture.
- Butter Timing: Brush melted butter on the corn immediately after unwrapping. This ensures it absorbs flavor while still hot.
- Season Generously: Don’t skimp on salt, pepper, and paprika! These seasonings enhance the natural sweetness of your corn on the cob in the oven.
- Check for Doneness: If you’re unsure, pierce a kernel with a fork to check tenderness; it should be juicy and tender but not mushy.
How to Store and Freeze corn on the cob in the oven
- Room Temperature: Enjoy your corn on the cob in the oven fresh for up to 2 hours after cooking; be mindful of food safety.
- Fridge: Store any leftover corn on the cob in an airtight container for up to 3 days. Keep it wrapped tightly to maintain moisture.
- Freezer: If you want to save some for later, freeze the corn on the cob after cooking. Wrap each ear individually and store for up to 3 months.
- Reheating: For best results, reheat your corn on the cob in the oven at 350°F (175°C) for about 10 minutes or until warmed through, keeping it covered with foil.
corn on the cob in the oven Your Way
Get creative and personalize your roasted corn on the cob for a truly memorable summer treat!
- Herb-Infused: Add fresh chopped herbs like basil or cilantro to the melted butter for a fragrant twist. This brightens up the dish with a fresh garden flavor, making each bite feel like a summer picnic.
- Spicy Kick: Mix in 1 teaspoon of chili powder or cayenne pepper with the seasoning for an added heat. If you enjoy a little spice, this variation will elevate your corn to new levels of excitement!
- Cheesy Delight: Sprinkle grated Parmesan or Cotija cheese over the corn after roasting for a savory finish. The creamy cheese melts slightly, creating a rich layer of flavor that pairs beautifully with the sweetness of the corn.
- Sweet & Smoky: Drizzle honey and a dash of smoked paprika instead of regular paprika for a unique sweet and smoky blend. This unexpected combination will surprise your taste buds and leave everyone reaching for seconds!
- Garlic Butter: Incorporate minced garlic into the butter before melting it for an aromatic boost. This variation adds depth and richness, transforming simple corn into an indulgent side dish.
- Zesty Lime: Squeeze fresh lime juice over the finished corn and add lime zest to enhance brightness. This zesty addition brings a refreshing tang that perfectly complements summer barbecues.
- BBQ Glaze: Brush on your favorite barbecue sauce during the last few minutes of roasting for a sticky, sweet glaze. This creates an irresistible caramelized exterior that’s perfect for BBQ lovers!
Make Ahead Options
If you’re looking for a hassle-free way to enjoy delicious corn on the cob in the oven during your summer gatherings, this recipe is perfect for meal prep! You can husk and clean the corn up to 24 hours in advance, ensuring that your ears of corn are ready to go when it’s time to cook. Additionally, you can melt the butter and mix your seasonings—salt, black pepper, and paprika—up to 3 days ahead of time. When you’re ready to serve, simply preheat the oven, wrap each ear of corn in aluminum foil, place them on a baking sheet, and bake for 30 minutes. After unwrapping, brush with your prepped melted butter and sprinkle with the seasoning mixture for that fresh-out-of-the-oven taste. Enjoy saving time while still serving up a mouthwatering side dish!
corn on the cob in the oven Recipe FAQs
What type of corn should I use for this recipe?
Fresh, sweet corn on the cob is your best bet! Look for ears with bright green husks and plump kernels. If you’re short on time or fresh corn isn’t available, frozen corn can work as a substitute, but the texture may differ slightly.
Can I prepare the corn in advance?
Absolutely! You can husk and clean the corn up to 10 hours before cooking. Just wrap it tightly in foil and keep it in the refrigerator until you’re ready to pop it in the oven. This way, you’ll have more time to enjoy your summer barbecue!
How do I store leftovers?
If you have any leftover roasted corn on the cob (although it’s hard to resist!), let it cool completely, then store it in an airtight container in the fridge for up to 3 days. To reheat, simply wrap it in foil and warm it in the oven at 350°F (175°C) for about 10-15 minutes.
Can I freeze roasted corn on the cob?
Yes, you can freeze roasted corn! Just make sure it’s completely cooled before wrapping each ear individually in plastic wrap and aluminum foil. Place them in a freezer bag, and they’ll stay good for about 3 months. When you’re ready to eat, thaw them overnight in the fridge and reheat!
What if my corn is overcooked?
If you notice that your corn is getting a little too soft while baking, just keep an eye on it during the last few minutes of cooking. Ideally, you want that perfect balance where the kernels are tender yet still have a bit of bite to them. If you’ve wrapped them tightly, they may retain moisture better—so keep experimenting until you find your sweet spot!
What can I serve with this roasted corn on the cob?
This deliciously roasted corn pairs wonderfully with grilled meats like chicken or burgers, making it a perfect side dish for summer gatherings. For a fun twist, try sprinkling some crumbled feta cheese or chopped herbs on top right after brushing with butter; this will elevate your corn experience even more!
Corn on the Cob in the Oven
Ingredients
Method
- Preheat the oven to 400°F (200°C).
- Husk the corn and remove all silk.
- Wrap each ear of corn in aluminum foil.
- Place the wrapped corn on a baking sheet.
- Bake in the preheated oven for 30 minutes.
- Remove from the oven and carefully unwrap the foil.
- Brush the corn with melted butter and sprinkle with salt, pepper, and paprika.